If you are new to Google Analytics, the first step is to sign up using a Google Account. You can do this by visiting www.google.com/analytics
Step 1
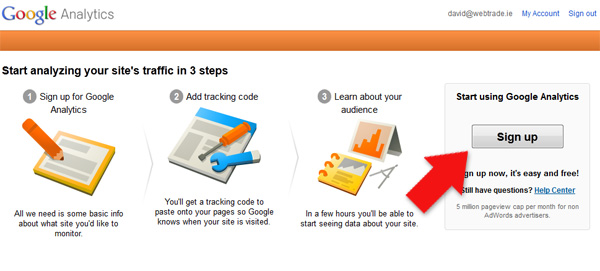
As you can see from the screen shot here there is a sign-up box on the top right hand side of the screen with a “Create an account” button.
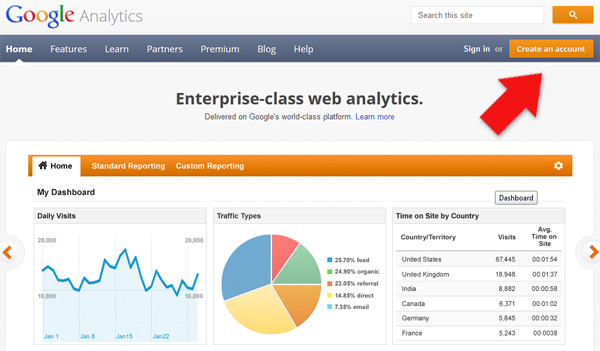
Click on the “Create an Account” button and you will be redirected to the Google Account sign in screen.
Step 2
Next click to the red Sign Up button at the top right hand side of the page.

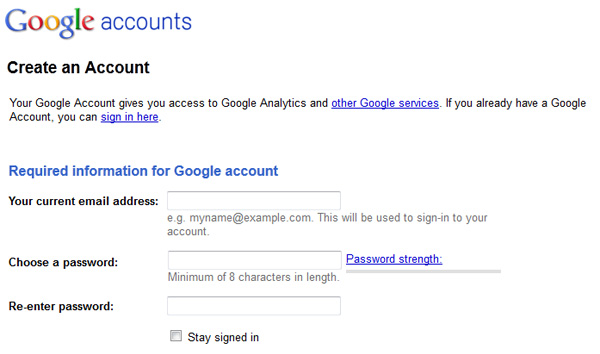
Step 3
You will next be asked to provide an email address and password, the email you provide will be your username on the account going forward, this email can be a company email or personal address, it doesn’t have to be a gmail account. Fill in a registration form and click “Create my Account” to finish. If you tick the “Stay signed in” box you won’t have to sign in to your analytics account when logging in through your own website.
Step 4
Once you click the “Create my Account” button an email will be sent to the address you provided to verify the account, make sure you click on the verification link sent within this email.
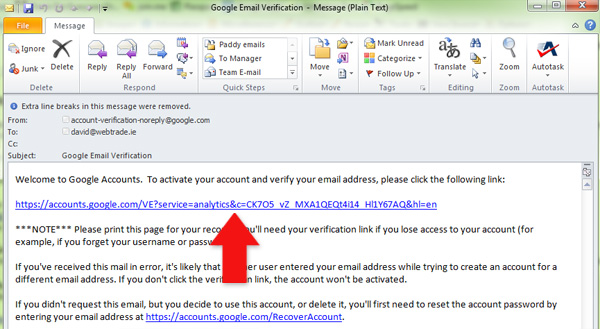
Once you click on the link within the email you will be brought to the following page, just click on the “Click here to Continue” link and we can begin the website registration.
Step 5
We now have our account created and verified so we can now move onto getting our website registered with Google Analytics, this will allow Google to begin tracking the traffic to your website and give you a daily breakdown of visitors and how they are finding you website. So to begin, click on the “Sign-Up” button.
Step 6
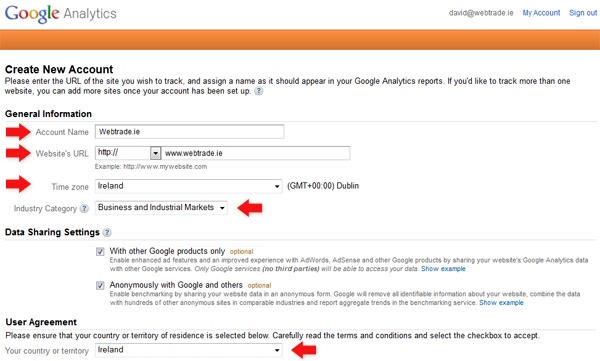
The next screen will prompt us to fill out information about our website
- Account name – This is to easily identiy the analytics account when you first login, mainly useful if you are tracking a number of different websites, I generally use the website address without the www.
- Website URL – This is your website address. Select http:// from the drop down menu and type in the address of your website
- Time zone – Presumably this is going to be Ireland, if not select the country appropriate to its visitor base. This is to ensure you get accurate daily estimates of visitors to your website.
- Industry category – This is for Googles own marketing purposes, choose the option which your company would closely fall under, your selection here will not affect tracking and data collection.
To finish, select your Country from the dropdown list under “User Agreement” and tick the terms and conditions box and click “Create Account”.
Step 7
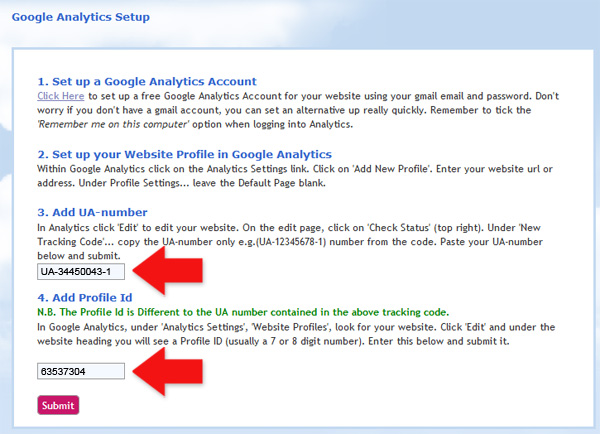
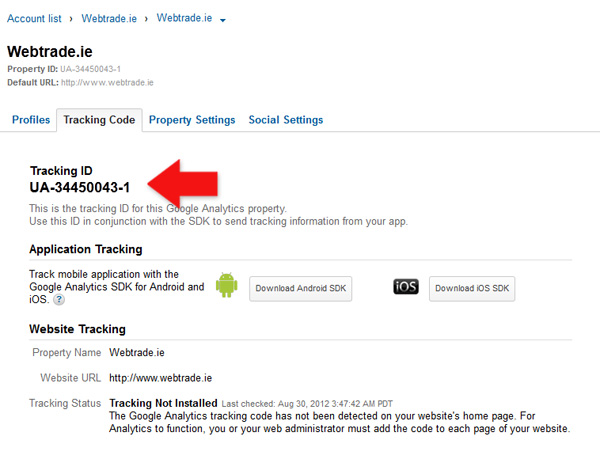
We are then brought to page that gives us a tracking ID to install onto our website. As you can see from the screenshot, there’s a UA code that must be applied to your website, this will basically tie both website and analytics together.
Step 8
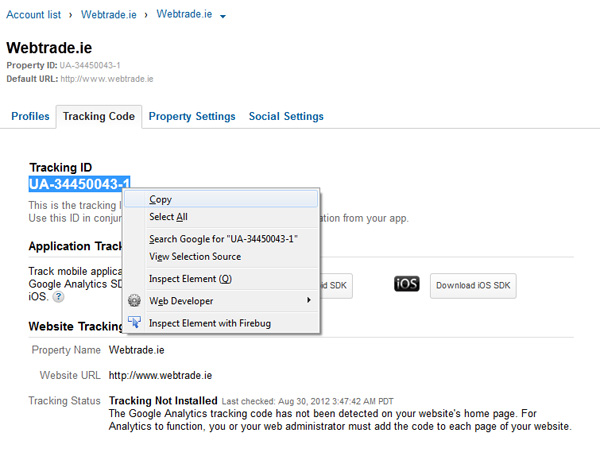
So first thing we need to do is highlight and copy the UA code, paste this into a notepad or word doc so we can use it again.
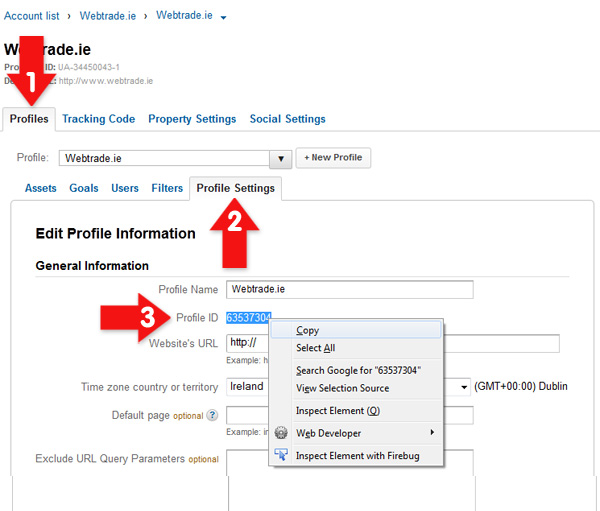
Next we have to click into the profiles tab, profile settings, and copy the Profile ID into the same notepad or word doc.
Step 9
So once the UA code and Profile ID is copied we have to open a new tab or window in our browser and goto our website. When your website loads, login using your username and password and hover over the SEO button found on your website homepage and click on the “Setup Analytics” link.

Step 10
Simply paste in your UA Code and Profile ID and click submit. Your website is now tracking visitors to your website using Google Analytics!